-->

Growing a Garden

So for the past two years I've wanted to grow a garden. I've dreamed our walking outside and picking fresh tomatoes off the vine and cutting some green veggies for a salad. That's my inner Martha talking. Anyways the idea grew (pun intended) while watching the movie It's Complicated. Love the movie, Love Meryl and Love Her Garden!


The garden in the movie is just breath taking. I love the size of the garden and mixture of flowers and vegetables. Keeping it real, our garden will be small. I really like the look of raised garden beds, they seem much easier to create and maintain. 


{ via here }


{ via Sunset }

I like the look of the raised garden beds that have a trellis on the back for vining vegetables. Right now were in the process of brainstorming the placement of our garden and most importantly what veggies to grow. We meaning Mr. CLH will start working our veggie garden over the long Memorial Weekend. I'm excited to get this project completed before the baby arrives in Mid June. I think the garden will also be fun for Tabari, he'll be able to watch his veggies grow. 


Do you have any plans for a garden for your home?

Photobucket

Project Nursery: To Rock or Not to Rock?

When we started planning our sons nursery the biggest question on my mind was to Rock or not to Rock? If your planning your nursery on a budget, its slim pickings when it comes to nursery chairs that are stylish. The most affordable option that we came across was the glider. I have friends that have gliders in their nursery or home, but even though they are comfy its just not us. So we decided not to glide in the nursery. I wanted a chair in our sons nursery that wouldn't get kicked to the curb. On the plus side, many of my friends have donated their old glider to the local children's hospital!  


( nice and comfy, but a nope )

Then, Hasani and I started thinking about going 'old school' and looking at a traditional rocker. I started searching on Craigslist for a cool vintage rocker that we could give new life. As everyone knows a little white paint can go a LONG way.


( Random Rocker from Craigslist )


We thought transforming a old school rocker into the one the way below would be perfect. Then comes the big BUT, I have to sew a cushion for the rocker bottom and maybe top. 


( via here)

I love to break out my sewing machine and get my creative-ness on, BUT I realized even with funky fabric I'm not sure how long it would last in the nursery once the little guy was mobile and pulling himself up. One older son was an early walker at 8 mos. Plus I wanted something a tad more modern, since his crib is classic.


So instead of continuing our nursery chair search we took a break. I highly recommend taking a break when you hit a design wall. It really gives you time to take a breathe and start looking again. When we began looking again, I though Ikea may have the perfect solution. But The only chairs I like at Ikea for our sons nursery were armless, not perfect for nursing a baby in my eyes. So back to the drawing board. One day I was browsing World Market online and decided I should check out their chair options, within a few minutes I came across the perfect chair for the nursery! I fell in love with the Luxe Chair from World Market, wait I know what your thinking. A white chair in a nursery? 


Well almost a white chair, this is the chair frame, you purchase a slipcover separately! That's one of the reasons why I fell in love with this chair - yup the wash factor!! I love that I can throw in in the laundry as needed, I'm also thinking about Scotch Guarding it for more protection, still need to look into that. I also love how deep the chair is and the comfort factor. The back pillow on the chair is down and so is a portion of the cushion. Can we say relaxing! Here's the Luxe chair in the nursery, we opted to go with the Charcoal slipcover which look great against the pale grey walls and artichoke pear curtains and our new deep brown wood floors. 


Yup, were still on the hunt for the right size closet doors. Looks like we'll end up ordering some.


We also got a great deal on the chair. Here's the breakdown, we bought the chair frame first and used a $ 10 off coupon I found online (remember always Google for coupons!) The chair was $ 140 less the $ 10 off, we paid $ 130! We bought the chair frame right before refinishing our floors so we waited to buy the slipcover, well again I found a coupon online this time 25% off! The slipcover was 109 less 25% off, we paid 82.49! Total for the chair $ 222.49 (not including taxes) not bad at all. We saved $ 37.49 --- Get the latest World Market Coupon Here


We both love the style of the chair, its for sure one of those grown with me chairs, I can already picture Tabari sitting in the chair reading to his baby brother and that my friends makes the buy Priceless :)


What do you think of the chair? Did you splurge or save when buying a chair for your nursery?


Follow Along: As we create a nursery for our baby boy due in June 2011. From the beginning; Nursery Bare BonesPaint Makes the DifferenceBye Bye Boob Light  &Hemming & Hawing, Crib Notes

Photobucket

Design Style Quiz

I love taking quizzes they are so much fun. Yesterday while browsing on MSN I came across a fun quiz all about your personal design style. Like a geek, I was super excited to take the quiz and find out my personal design style, because its always hard to nail down your own personal style. At least it is for me. Here's a screen shot of the quiz.


The design style quiz asks you 12 basics questions and about how you decorate your home and whats important to you. According to the quiz my personal design style is Modern GlamNot only are you the life of the party but your home is also party central! From bold wall colors to flashy chandeliers, embrace the wow factor.


Oooh I love how Modern Glam sounds, and I do love pretty light fixtures! 


Design Style Quiz - Click HERE 

Now its your turn, take the quiz and share with your results, What your your design style is? And do you agree or not with the quiz results?

Photobucket

Chic Little Main Line: How to Unclog Your Drains Like a Pro

When roots from trees ,hair or something plugs up a pipeline and causes your toilet not to flush and maybe water to back up in the tub and or sink a plumber would tell you 'you need a clean out' and charge you anywhere from $ 90 to $ 300 dollars so I'm going to show you how we did it for $33.00. A few years ago we noticed that the water in the tub was not going down the drain and the toilet wouldn't flush completely. We ended up calling a plumber and spending a lot more than we expected for a job that seemed too easy (to me) Fast forward 2 years, to 2 weekends ago to be exact, water in our shower wasn't draining which made it impossible to wash laundry, dishes the basic stuff in life, all on a Holiday Weekend - Easter.

So this time before calling a plumber or spending the $33.00 I tired using things I already had around the house to see if the clog was minor hot water, soap and bleach usually gets minor clogs out . My second thought was to snake the main line drain by accessing our clean out. What is a main line drain and clean out you ask? A main line drain is your house's main sewer line that connects to the county line sewer line. Here's what I did.


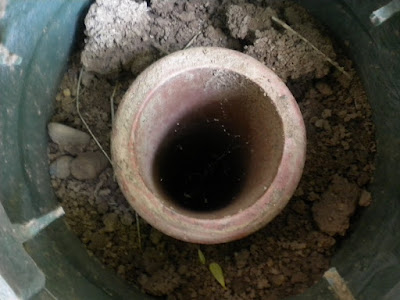
First thing you want to do is check your clean out, by removing the cap on the sewer line this is usually found in the back yard lined up with the toilet . Your local sewer district should know if yours is in the front or back of your home. This is the access point point most plumbers use to snake your drains. The further you get from the house the deeper the pipe is going to be so its better to find the one closest to the house there should be at least two openings you can get to with the caps sitting at the surface( maybe under the stairs ,patio ). 


You can use a screw driver to lift the cap up .You will see a pipe going down unscrew the top off it may be filled to the top and water shoot out depending on how backed up it is but if you don't see any water, run a water hose in it and see how fast it fills up this will give you a nice idea of how far down whatever is clogging it is .


Next go to your local hardware store and ask for a snake you can rent one from $30 to $50 a day depending on how many feet you need. I rented a power snake from HD Home Supply same place we rented the floors sanders. In our area the have the best prices on rentals. This is what the pros use. 


I suggest getting one that goes all the way to the end of your yard  where your property stops and the county line starts in our case the 75 foot snake was the middle size reached our back fence which is where the county's line starts. If the county's line is the one clogged then they come out and repair the sewer line for free! Free is a good thing, but so is only spending $ 33 bucks.


Where our county line starts - the very end of our property line. 


The snake has one switch that goes forward off and reverse and one foot pump that's similar to a gas peddle .


You want to make sure that you are close as can be to the hole and have a flat surface to put the machine on I suggest a board this will keep the snake from wrapping and twisting up. There are different types of blades to put on the end of the snake try using one with teeth on both sides. 


This is where you attach the various blades


Feed the snake in the hole slowly with you foot on the pump/peddle and the switch set to forward if you feel it hit something switch to reverse slowly pulling the snake out the hole and go forward again one its loosened up this is cutting and pushing whatever is in the pipe down to the sewer line. 


Once the snake has cut through the clog the water will rush down the pipe. I like to run the snake all the way out then slowly reel it back end making sure i get everything in the pipe then run the watter hose in the pipe for about 15 20 minutes to check the flow whole process this should take anywhere from 30 minutes to an hour and save hundreds of dollars . Before returning the snake to the store, turn all your inside faucets all, flush the toilets make sure everything is flowing properly. Our clog was caused by tree roots, not surprising since we have tons of mature trees in our 1950's neighborhood. For hear on out, I plan on renting a power snake once a year around Springtime to catch any clogs before we get slow drains in our house.


All in a days work, oh yeah wear clothes you don't mind getting stinky dirty & a mask - just saying.


Thanks for reading, hopefully this will save you a ton on your next plumbing issue. 


Hasani aka


Mr.CLH

Spring Intervention

Over the weekend our flowerbed and front porch received a Spring intervention performed by the family. Normally our front proch is nice and tidy and our flowerbed full or flowers and no weeds. Our flowerbed has come along way since buying our house a little over 2 years ago. We replaced the leaning brick with stone and added pretty flowers & hanging pots, installed a trellis, painted our front red (in addition to painting our house and installing shutters) which added tons of curb appeal. Here's how our gardenbed and front porch looked like last Spring.


We've been working on various indoor house projects and getting lots of rain, the front porch and flower bed etc have been neglected. Finally after pretending not to see weeds, dead plants & leaves and a dired up paint brush, I decided its time to stage an intervention. Yep this is how the entrance to our front door looked, can we say so un-welcoming.


I really wanted out bring various shades of color into the flowerbed and on the front porch. I stoped in Lowes, Home Depot & Wal- Mart since both our close to our house. For our flower bed I always try and look for pre annuls because they come back year after year. For our potted plants anuuals are fine, becasue its far easier changing those plants out. While at Home Depot, I found a really pretty shurb called sweet broom, it has soft green leaves and delicate yellow flowers. I knew the shurb would look perfect at the very begining our our flower bed. This will make the third plant we've planted in that exact spot. Let's hope this one grows!


Before planting, I soaked the flowerbed and we pulled all the weeds and added some fresh topsoil to the flowerbed. After planting the flowers we used one bag of mulch. New mulch makes a flowerbed look so much better. I also replaced the dead flowers in our hanging pots and pots on the front porch with fresh flowers. 


A quick sweep of the front proch and a little rinsing off of the siding and front door made a huge improvement. I aslo swtiched out our Fall / Winter rubber mat, with a mat simple door mat from Ikea. I think I'll add a little more personality to our mat soon. Here's how our gardenbed and front porch looks like now, interventions are good thing.


Thank goodness we performed this intervention before the hot Northern California Summer arrived. Our house feels more spring like and so much more inviting. I still have plans to add a few more colorful bushes is this garden bed as soon as I find the right ones. We also plan on added some more colorful bushes to 'the other side' our garden bed under our livng room window. But I'm looking forward to making some improvments to our backyard soon?
Have you performed a Spring Intervention around your home?


Photobucket

Project Nursery: Crib Notes

There's something about actually putting a crib in room it's intended for that made me giddy with excitement. But lets back up a bit and talk about our very quick crib hunt. When we found out we where pregnant, I pretty much already knew I wanted a Jenny Lind Crib. Our oldest son also had a Jenny Lind crib, I loved it then and I love the crib now. I knew wanted, just had to convince Mr. CLH the crib in white wouldn't look to girly, lucky for me he agreed. I was all set to buy the crib online via Amazon.com less hassle. 
One day way back in January, while out Shopping with my husband and I our son I stopped in Sears to check out baby items. I stopped dead on my tracks when I saw the exact white Jenny Lind crib in white and on clearance! For 1/2 the price the Amazon one was, so our crib only cost us $ 99.99!! Remember how I said, buying online would be less hassle, well only two of us could ride home in the car, since the crib took up our backseat. So I stayed behind while my husband and son took our crib home, while waiting on them I hit up the food court. Here's Mr. CLH putting the crib together last weekend. 


After we out we were expecting a little baby boy, my hunt begun for bedding and would work well with the Artichoke Pear Curtains, I fell in love with here. At first I was leaning towards buying a bedding set on Esty, but when you want a certain color it can be so HARD to find what you want. One day whiling strolling thought Target's baby section, I saw Dwell studio's new baby line. I was overjoyed when I say the exact color Artichoke Pear that I've been looking for. I also liked the cute modern animals  (giraffe, hippo, and camel ) pattern. Of course I bought the bedding and coordinating sheet. 

I wanted to bring in a bit more color in and pattern into the bedding with a fun print. I don't know if its just where we live in Northern California, but finding cute fabric can be a chore. So I looked online and came across this darling print for the crib skit. Like several ladies in blogland, I decide to sew my own crib skirt pants (my husband prefers saying pants since its for a little boy!), but skipped the sewing part and used iron on hem tape. It made the task of DIY a Crib skirt pants even faster. I attached the crib skirt to the bed using Velcro. As he gets older and we move the crib down, the skirt pants will be able to keep adjusting.


Here's the pretty fabric I used, I bought 2 yards and end up using most of it, the rest will be truned into some cute for his nuseryt. In person the fabric is less sprout green and more artichoke pear.  


Making the crib skirt pants, after each side was hemmed I used trusty blue painters tape to hold in pace to check the length. 


Even before placing the remaing beding on the crib, was already smitten with how the geometric pattern look against the classic lines of the Jenny Lind Crib. Again my iron pretty much sucks and wouldnt actaully iron the cirb skirt pants. Oh well.


 Last week after sharing the curtains for our baby's nusery I promised better pictures, of course I missed great sunlight momments, boo! But here's how our son's nursery looks right now. I love how all the patterns work so well together, and the chevron baby blanket, made looks cute laying on the crib.


I'm going to plant some pretty flowers in black hanging pots outside the sliding glass door and also a cute bird feeder to attrach birds in the summer.


The room is fianlly coming together, and our little one is set to arrive within the next 7 weeks. I'm hoping to have the nursery finished in the next 3 - 4 weeks, pray for me! lol 

What do you think so far?

Follow Along: As we create a nursery for our baby boy due in June 2011. From the beginning; Nursery Bare Bones, Paint Makes the Difference, Bye Bye Boob Light  & Hemming & Hawing


Photobucket

How We Refinished Our Hardwood Floors

Hey Blogland

I'm Hasani aka Mr.CLH this is my first official post so go easy on me lol .

We decided to re-do the floors because they looked every bit of their 50 + years. At one time there was carpet on the floor so in some areas you could see where someone had a hard time removing it and the color of the wood was a huge distraction at times. It didn't feel like us. Our hardwood floors before:


Prepping Our Floors

At first we both had our hearts set on a really dark brown for the new floors but then decided to go with a more natural color Minwax's Early American. After moving all the furniture into the garage and kitchen the first thing my Father and Law and I did was sweep all the floors and used a dry vacuum to remove any dust. Before sanding we taped off all the vents so that the dust wouldn't get stuck in them, we even put a large plastic bag around our bedroom chandelier. I tired really hard not use news paper with good coupons on them but some had to be sacrificed for the good of the house lol.

The Sanding Process

Next we sanded the floors using a drum belt sander and a edge sander (a heavy duty hand held sander for the edges and corners) we rented from HD HOME SUPPLY way cheaper than any other place we looked, and the had a 20% off rental special that weekend, bonus. We used 36 grit sandpaper to start the process. We did a test area in a closet to see how well the old stain was coming up. It's always good to test in an area like the closet.

When sanding the floors you want to so back and forth in the directions of the wood grain, don't stop in one place or you good leave gauges in your wood. My Father in Law used the drum belt sander, we started in the nursery first.


After he finished a room, I used the edge sander for the corners and edges of the floor its really good for the hard to reach areas and around the base boards and corners. It get really tiring since your on knees the entire time (I wore knee pads which really helped) But its the only way to get those hard to reach areas and make your DIY project look professional.


It took us about 12 hours split up between two days to get all the floors completely sanded. I really liked how the bare floors looked. We did one last lap on the floors using a 100 girt sandpaper, gives the wood a nice smooth finish. After the floors were completely sanded we still had to remove dust from the floors (even though there was a bag attached to both sanders) we used a small amount of water and 'damp mopped the areas.' Next we waited for the floors to completely dry before applying the stain.


(The Nursery)


( Tabari's Room )


(Living Room Floor)

We chose the color Early American after a quick trip to Home Depot right after the floors were bare of old stain, we test, new oak wood right in the store, Katrina and I agreed we liked how the color look instantly. Again we used a closet to test the color of the stain making sure the color looked good on our old floors.
We got a GOOD price on 2.5 gallons of Poly, on clearence.


Applying Stain

We used small water container to pour the stain on the floors. We used a lambs wool applicator and lint free towel to apply the stain on the floors. Make sure you apply the stain following the direction of wood grain. Then we wiped the excess stain off using the lint free towel waiting only a few minutes between wiping. We only had to wait a five minutes because the floor was soaking up the stain quick and we didn't want the color to be too dark. After wiping away the first section, I got excited. I could tell the floors where going to look really nice.


The hardest part about working with the stain for me was keeping my hands from touching the walls. I had to touch up paint many parts of our the walls!


Once the entire floor is covered in stain you have to wait 24 hours before applying the second coat thank god we only needed one coat. I think two coats of stain would have been to much. We used almost 2 gallons of the stain we bought.

Applying the Poly

The next day we applied the poly. We did a light sanding using a 120 grit sandpaper and then removed dust. This time we used a floor orbital sander my father brought with him. Before applying the poly, my Father in Law thinned out the poly with paint thinner. By thinning out the paint thinner the poly was easy to pour on the floors. Make sure you talk with your local paint store before before thinning out poly. My Father in Law has lots experience thinning out paint and ploy and knows the ratio (poly & paint thinner). He worked well under my supervision, lol.


Again we used a thin nosed watering can to pour the poly on the floors. My Father in Law applied the poly on the floors, since he is experienced at at. He used a weighted pole, again he followed the grain of the wood floors and was very careful not to leave lap marks. Which can happen easy with poly. We waited another 24 hours before applying the second coat of poly. After the last coat of poly was applied we wait 72 + hours before returning home.

Budget Breakdown:

Floor Sander Rental: $ 32 (after 20% off discount) 24 hr Rental
Edge Sander: $ 21.75 (after 20% off discount) 24 hr Rental
Sand Paper - Gift from Father in Law
2 Gallons of Minwax Early American Stain: $ 43.88 - Used a Lowes $ 10off Coupon at Home Depot! Gotta Love Price Matching
2.5 Gallon of Minwax High Build Poly: $ 26.79 (on clearance! at Lowes)
Oil Varnish Applicator: $ 6.78
Labor for Father in Law's Help: Dinner at Sizzlers, his favorite restaurant: Priceless

Total Cost $ 131.20 to refinished our Living Room, Hallway and Three Bedrooms

While we where at Home Depot looking for stain we noticed an ad for refinishing hardwood floors, the cost $ 4.00 a sq foot. We estimate having our wood floors done though them would have cost us around $ 4000-

Savings, just a measly $ 3800- give or take a few bucks

I love the new floors its dark like we originally wanted and still has natural earth tones. I also like how our wood floors have charactor and like the various shades of color. Here's our floors now (we'll share more picutres of the after, once Katrina and I finish up a few changes in the rooms)


( The Nursery)


(Our Bedroom)

Thanks for reading if you have any questions feel free to ask .Good luck if you decide to take on this project its a lot of work but well worth it.

*Remember to do your the research 1st before taking on this project, prices may vary in your area the stain make take different on your floors.

Mr. CLH