-->

I Need a Sewing Closet STAT

Lately I've been getting my sewing on, I've been making stuffed giraffes, burp cloths, a blanket, pillows etc. And only a few days ago I realized I need a place for all my sewing gear. No longer can my sewing machine, piles of fabric and thread just lay around on the dining room table, making family dining 'fun.' I'm in need of an actually little space to keep my gear organized. Yup, I've been bitten buy the 'Nesting Bug' The overwhelming need to create a dozen projects 2.5 months before our little June Bug arrives. Like life isn't busy enough! 


So there's really not too many options for a sewing area in our tiny Rancher, but I can figure it out. It's only fair too, since my husband recently created a nifty organized tool area in the garage for himself. I figure the best spot in the house to keep my stuff nice and tidy is our small coat closet in the our hallway. When I say small, I'm really giving it way to much room, its freaking tiny. I know for sure, the ironing board / iron will have to stay, but I'll come up with a better storage solution. Other than those two items, I will find another spot in our Casa for the rest { I hope } coats, x-mas ornaments etc. 


Here are my 'musts' for this tiny space. 


1. Hang Iron board on back of door, along w/iron, spray starch
2. Add more lower shelves to hold Sewing machine 
3. Containers / Drawers for sewing supply storage { thread, needles, bobbins, patterns }
4. Spot for misc. fabrics 
5. Color ? Why Not!
7. Small swing arm lamp next to sewing, to see supplies better { it is a closet after all }
8. Spot for Sewing Books 


I don't plan on using this space for my actual sewing spot I'm lazy and like to watch TV or listen music while I sew but the closet does have an electrical outlet & if I found a cute fold-able chair I could hang inside, hmm. It would make a cute spot for sewing


To keep my self grounded in reality, I only looked and teeny spaces for my sewing closet inspiration. But 1st this is my sewing work space!! But I'm cool with just using wooden hangers instead, if it means all the pretty fabric will be on display.


{ No Source, Came Across this image eons ago }


Okay Back to reality, am I the only one humming the song { Back to reality back to life, back to the here and now } Yeah I'm goofy sometimes :)  I love this sewing / craft closet below. Oh, how I wish my coat closet had two doors. Here's but I like { besides the Chandy, pretty wall paper etc } I like the peg board used for indoor storage, we have one in the garage and we love it. I like all the shelves and how this space is tucked away all pretty and special.  


{ via here }


I also like this peek at sewing / craft storage ideas. Plenty of boxes to hold supplies, jars to hold smaller items. I also like the use of the clips on the doors to hold ribbon and papers.


{ via here }


I also like this one a lot, its very piratical and every inch of space is used wisely.


{ via here }
I plan to start working my sewing closet soon, in-between working on the nursery & various household projects. I know I'll be so happy once I have a designated spot for all my sewing and craft goodies.


Where in your home do you work on Sewing or Craft Projects ? 


Or where would you like to create a spot just for you in your home?

Photobucket

DIY Chevron Baby Blanket

Last week, I shared the fabrics I planned on using to make my son a baby blanket. I thought it would be fun to make a modern Chevron print blanket. I wanted the blanket to be cozy in the winter and fun to play on in the summer months. I wanted the blanket to be a nice size but not too big, so I did a little research on the net and found a happy size for the blanket 36 x 36. Making this blanket couldn't be easier, its actually the first blanket I've ever made. So picture me patting myself on the back. I only had one mishap during my sewing, I broke a needle, so did have to make a quick run to Wal-Mart for replacement needles. I cut my fabrics 37 x 37 and allowed for a 1/2 inch seam allowance on either side.


Next I pinned my fabrics with the Chevron and Minky facing each other. I used all purpose white sewing thread and  worked my way around the blanket.


 I left about a 6 inch gap, so I could easily turn the fabric inside out. Next I did a simple hand stitch and closed up the hole.


I wanted to give the blanket a more finished look, so I did a simple top stitch 1x on top of the chevron print. I am by no means an excellent sewer, so I just took my  time keeping a straight line.


Here's the modern Chevron blanket, I made for my little baby boy. It's the perfect blanket for him to play on and for cooler evenings out. I love the Chevron print has many colors that all look so cute together.


I held the blanket up against the nurseries new wall color Silver Drop and love how it looks in the room already.


I love this blanket, and it was made on the cheap. The Minky fabric was only $ 4.54 for one yard and the Chevron was $ 8.98 - Total $ 13.52 plus I found a coupon online taking 10% off my purchases, so I spent around $ 12 bucks, not to shabby. I bought this fabric from Fabric.com 


What do you think of the Modern Chevron Minky blanket I made?

Photobucket

Project Nursery: Paint Makes the Difference

We finished painting the room, and I already love the transformation  even without any furniture present! After looking the the two color options Martha Stewart Opal or Behr's Silver Drop paint colors we decided to go with Behr color. We had the color matched to Olympic Paints Low VOC paint line. We couldn't be happier with our color choice. After the painting was complete, I realized every bedroom in our Rancher is painted a shade of grey! I guess my love of grey has spread to all of our bedrooms. Here's a quick reminder or how the nursery looked a few short days ago. I addition to painting the the walls Mr. CLH also paint the ceiling a crisp white, also using Olympic Paint Low VOC ceiling paint. 

Nusery Before:


I took the picutres of the nusery in the afternoon on a non sunny day, so hopfully you can still see the color ok.I love how the color Sliver Drop looks in the nusery. It's such a pretty shade of grey, not overly dark or deary. It's a sublte color.  We also made the existing baseboards in the room taller, just like we did on our living room. Here's our how to { Making Baseboards Taller } By adding height to the baseboards it really creates an elegant look. Next up we need to paint the baseboards a glossy white and freshen up the trim too.

Nusery Now


 Here's a peak at our color scheme for the nursery, were mixing a color called Sultana { by Martha Stewart } with pale blues, light greys & dark greys and white. I'm really excited about added Sultant to the room, I love the color! It's such a fun punchy shade of yellow / green.


This is our mini Construction / Improvement Breakdown:


Replace closet doors { This weekend }
Paint Ceiling & Walls
Replace light fixture { Install amazing Light Fixutre we already bought this weekend }
Beef up our baseboards { like we did in our Dining Room }
Improve closet storage
Crown Molding - on the maybe list

What do you think of the grey shade we paint the nusery and our color schemce?

Follow Along - as we create a nursery for our baby boy due in June 2011: Nursery Bare Bones


Photobucket

Gifts from UPS

Is it just me, or it is really cool when the big brown truck pulls up to your home and drops of goodies. I've been waiting for these goodies for 7 days. Not n eternity by any means, but when your belly is growing { Now 7 mos :) } and the packages contains projects your working for the baby, every day counts! Here's the loot I bought. White minky fabric and that is so soft, fun chevron fabric, striped fabric and brown dot fabric. I also ordered fabric for pillows I want to make in the living room, but I was sent the wrong fabric! Not to worry the Customer Service at  Fabric.com was super helpful, the fabric I actually ordered should arrive in a few days. 


Now here's my complete fabric stash for the baby and my plans. I plan to make a blanket using the Minky fabric and Chevron print. . All the remaining fabric will be used for DIY burp cloths, but I also plan on using the Stripped fabric for another fun project for the nursery. Both the Chevron & Striped fabric contain a few colors that are in the baby's bedding. Last night I already started sewing the blanket and will have it finished in no time. 


I have to get all my nursery sewing projects completed this weekend, because next weekend we have a whole house project  we are tackling.  I will literary have no place to sew, I'm hoping to also make some more progress on out bathroom this weekend. I'm so excited about next weekend, its something we wanted to do since buying our little rancher, and will maker a huge improvement to our home. I'll be sharing our prep work we are doing next week to prepare for next weekend.  

What do you think of the Chevron fabric, isn't darling? 


Any ideas on what next weekends project involves? 

Photobucket

Oh Baby: Etsy Artwork in Nurseries

I have a confession to make, I spend way to many hours of my day looking at nursery artwork on Etsy! I'm not kidding, I'm always on there. I've been looking for modern nursery artwork for our baby's nursery for months and even though we have Ikea Ribba Frames ready to be filled with Art, I still haven't bought anything. Let me explain, I plan to DIY some artwork and buy artwork, but the selection on Esty is amazing & at really good prices. Nurseries 


Here are some artwork I'm digging for our babies nursery - feel free to chime in which ones your like! Personally I love ABC prints in nursery, kids room you name it. This one from Sugerfresh, is a cute modern take on the ABC's


{ via Sugarfresh }

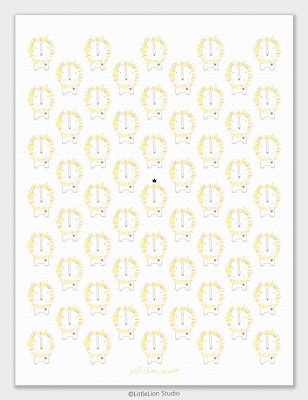
I'm really fond of almost every print from LeoLittleLion. Talk about darling and so perfect, I love how whimsical their artwork is and Original :) This print is called 'Lion King'


{ via LeoLittleLion }


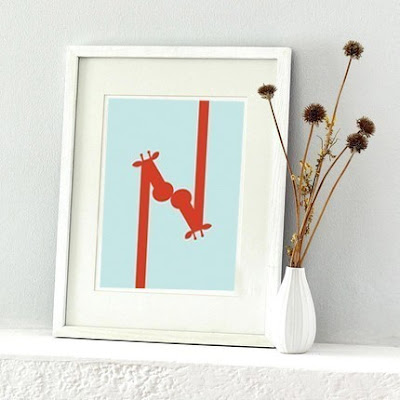
Name initials done in a super cute way, Weedoodle transforms letters into kid friendly artwork. I think this print works in so many areas of the home & not juts baby rooms. I could so see this print in a Gallery wall in a home, or maybe my older sons bedroom.


{ via Weedoodle


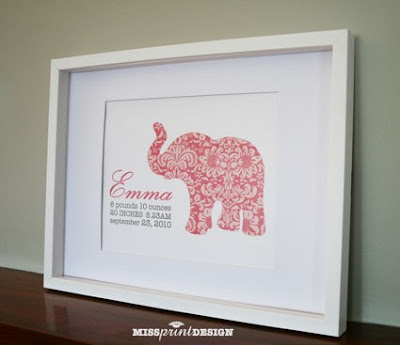
The Etsy store MissPrintDesigns has cute nursery prints for nurseries among other pretty paper products.  This one caught my eye. I how how its personalized to the baby.


After I made Stuffed Fabric Giraffes for the nursery, I revived a comment telling me to checkout the Esty seller Giraffes and Stuff. I was instantly smitten, with this modern giraffe print. 


So this is one of my to do projects for the nursery...find the perfect modern artwork. Are there any Etsy baby artwork sellers I need to checkout?

Photobucket

Project Nursery: Bare Bones

Finally the day has arrived where I get to share our third bedroom which up until recently we called the junk room! The room now has the pretty name the baby's nursery. Oh how I love referring to the room as the nursery. We haven't really touched this room since moving in, we slapped some paint on the walls { Cream in My Coffee by Behr } and called it a day. Here's what were working with its a standard small bedroom from the 1950's but this room has sliding glass door that leads to the back yard, not to worry we have an alarm system and a yappy dog! In the future we plan on replacing the sliding glass doors with french doors. One thing I love that this little room gets twice the sunlight our bedroom gets, which is directly across the hallway.

As you can see the room is a current blank slate. We went though all of our junk and donated a lot of items to the goodwill which always feels good. I took these pictures on a wet Sunday afternoon. This is how the room looks when you enter, we only have two full walls to work with.


The other wall is mostly taken up by the 5 ft slider, fortunately there's still about 2ft of wall space on either side of the sliding glass door.Here's the wall with the sliding glass doors, please excuse my tall grass/weeds in the back yard! lol Just keeping it real, but on the next Sunny day with have in N. Cali, please know Mr. CLH will out there mowing away!


This is the closet wall, the same wall the doorway is on. Oh how we hate these doors cheapo non working doors. They will be replaced with with white paneled closet doors. I'm going to make look less builder basic, trust me!


Lastly the current light fixture, this the last of its kind in our house....lets call it the Last of the Boob Light Fixtures shall we! If your new to reading our blog, we've already replace three of the these basic light fixtures { dining room, sons bedroom & ours } Instead of tossing them we drop them at our local Habitat Restore.


This is our mini Construction / Improvement Breakdown:

Replace closet doors
Paint Ceiling & Walls & Door & Closet doors
Replace light fixture { we bought and amazing one already!! }
Beef up our baseboards { like we did in our Dining Room }
Improve closet storage
Crown Molding - on the maybe list
Can't wait to share project! { it will be a secret of a couple more weeks }

We've already been testing paint color in the bedroom. It's a toss up between two colors. Here's the sample colors on the wall. We placed the colors in two locations, so we could see the colors in various lights thoughout the day. On the left is Silver Drop by Behr the right Opal by Martha Stewart.


Silver drop is a Subtle grey shade and the Opal is a very pale blue.

Hopefully you can see this little room has potential like we can. So much to be done, oh and those closet doors they are in the trash. That already made a huge improvement, trust me. As soon as we get some of these improvements out the way, the fun will begin { decorating}

Is there a room is your house your in the process of redoing?

Photobucket

Craving Yellow

It's no secret I love pops of yellow in my living room, lately I've been craving new yellow additions to our living room. With Spring finally appearing Northern California, I want to inject some fun new yellow fabric in our living room. I'm thinking of making some new lumbar pillow covers & and pillows for our sofa. 


{ via fabric.com }


{ via Calico Corners }


{ via Fabric.com }


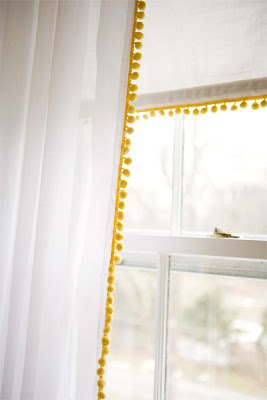
I think my new love of pom poms is growing by the minute, I would love to add pom poms to our basic white IKEA curtains in the living room. Isn't this pretty!! I think this would add so much whimsy into our living room!! I'm not sure if the husband would agree :) 


{ via here


I think new pops of yellow will be entering our living room very soon. What colors are you currently craving for your home?


Photobucket

Bathroom Update: Cutting Edge & All the Trimings.

My Sunday was all about cutting in with paint and fabric trimmings, yup and unlikely duo. On Sunday I stoped in Joann's looking to get started on possibly adding rick rack to our white cotton shower curtain { read more about the idea here } Joann's has a great selection of rickrack. I loved looking at all the colors.


I put together a possible color combination of rick rack together,  I liked various shades of blue . But I wasn't entirely sold of the blue color combination and couldn't find any grey rick rack! And grey is a MUST in our bathroom. The were a few other ladies in the rick rack section with me, most likely thinking I'm crazy for taking pictures! Oh well, got to remember the colors and of course share with all of you.

Next I looked in the trim section which sales the trim by the yard. I loved all the pom poms! However they wont be making an appeqrance in the bathroom, I know for a fact Mr. CLH would nix the idea { he loved the mini pom poms on the giraffes }


Right now I'm not sure if we'll go with rick rack for this project or I might just add trim. I like the idea of added nice thick trim to our basic waffle weave white shower curtain or adding wide grosgrain ribbon. Either way, I plan on making a thrifty decision since our bathroom update is a mere 100 bucks.
via here.

We finally choose the paint color for our little blah box of a bathroom. As I mentioned before, we were looking at Martha Stewart's paint color line, and narrowed the colors down to three. In the end we decided to go with the color Rainwater. The color is a combination of soft green with pretty light blue undertones. We had the paint color matched at Lowes using Olympic paint ( in home we use Olympic paint & Valspar). Instead of breaking out the rollers, opted to cut in first which makes the whole painting process much easier. Don't worry everyone the paint is Low VOC and I wore a mask :) Gotta protect my lungs and our baby. I loved how the color looked when first applied and loved it even more after it dried. I was a little hesitant first because its a dramatic change going from a beige box to living in color. Here's how the color looks so far in the bathroom, Mr CLH will be painting all the high areas and low, since my bumps in the way. In the pictures below the color looks more blue, buts on more of the green side.


The 'paint girl' did and amazing job of color matching the Martha Stewart color, the very top corner is the swatch I gave her. Of course I some how lost my large swatch of the color, so she gets extra props. On Saturday we found a nice thick bathroom mat of the bathroom. I'm in love with it! So this weeks agenda will be to finish painting the bathroom & Mirror and seeing how we like the bath mat. This is one of those slowing going projects since were also working on a few projects. Here's a more true representation of the color Rainwater.


What do you think of the bathroom color so far? Too dark for such a small space? Or do you like?

{ follow our bathroom progress & ideas part 1, part 2 }
Photobucket