-->

Thinking Out Loud

For the past few months I've been on the hunt for a vintage { yet safe } wood high chair for the little guy. I really love the idea on taking old stuff and making it new again and would love to do the same with a high chair. Even though there are some cool new high chairs out there, most seem big and bulky for our small dining room, so vintage mostly likely will be the way we go. I would love to paint the vintage wood high chair a fun color, maybe a shade of teal? Or just play it safe with white? I'm also liking the idea of painting it glossy grey. I also plan on making a thin seat cushion, instead of using regular fabric, I plan on using oil cloth - perfect for babies. The high chairs below is a perfect example of what I was thinking.


 { via Drab to Fab }

Hopefully I'll be able to find a darling vintage one soon, after all Avery will be turning 4 months soon and a few months after that we'll be introducing solids. I do have a backup plan just in case I can't find a vintage safe wood chair to redo. Enter Ikea, they sale two wooden style high chairs that could work well. The Blames highchair has a great shape, I would love it in a glossy grey or white. 


The runner up if we go the Ikea route is the Gulliver, I would also love it glossy grey or glossy white. I like that this one pushes directly up to the table, making family dinners much easier. This one has a much wider bottom base, so I'm not sure if it would work for us.

Whatever route we end up going for the little guys highchair I'll for sure share.On my to do list this weekend finish up some misc. diy projects and stalk Craigslist for the vintage wood chair wish me luck!


What are your plans this weekend?
Photobucket

Family Life

A few weeks ago our family took some professional pictures, with the addition of Avery we knew it was the perfect time. I'm so glad we took pictures, and had fun during the shoot. Hasani  loved the idea of taking the pictures in the same garden we got married in. He's a sentimental guy and a keeper, lol. So much has changed since I grew up, back in the 80's family pictures for  my family were super serious and always taken at Olan Mills. So its cool now that modern family pictures are taken on location ( I sounds so Tyra ) Anyways here our a few of the pics we love!! We used a local photographer in Sacramento - The Blue Owl Photography, I like her style style a lot so happy with the results.


I'm ordering my prints today and soon they will be on display in our home, I love how personal family photos like our wedding pictures in our entryway will create the warmth in a home. I snagged 3 large 14 x 18 on clearance for $ 11.98 and got one of them for 10% Off do to a minor scuff! Remember always talk up those 'imperfections' to the cashier, lol { SAVINGS } In the frames we have a picture of Avery and Tabari taken at Picture People, I used two $ 18 package coupons, for 25 pictures each, pretty good deal. I just took a quick snapshot until they a re placed on the wall, so please excuse the glare. I also received the 8x10 Canvas I ordered from Canvas People ( I did pay $ 14.95 for Shipping & Handling) I really like it! We decided to use our blog photo for the picture. I'm thinking about ordering one more a black and white pictures from our wedding for our bedroom.


I'm thinking we might replace them with the family pictures taken at the Rose Garden, not quite sure. Oh I did notice while I was at Target buying those frames that ALL the white frames at my Target were on clearance What's Up With That? Ooh Wee What's Up With That? Makes me think of the SNL Song I LOVE singing, lol. Tell me I'm not the only one who sings that song? Whew September was a month of family pictures for us!

What do you think of the pictures, is it me or does Avery's eyes melt your heart too? Have you noticed all the white frames have disappeared at your Target too? What style where your family pictures when you were a kid?
Photobucket

CLH Featured on Baby Lifestyles!

Avery's nursery has been featured on Baby Lifestyles Magazine in their Real Nursery section. Baby Lifestyles is a new online Magazine and Website that shares inspiring nurseries and ideas with their readers, we are so excited to be apart of it! Please check out the Interview here. Below is a screen shot of the feature from my computer screen.

Please let me know what you think of the article :) I'll be back on Thursday to share another DIY project I just completed. Photobucket

Large Floral Print Drapes { Dining Room Update }

I really like our simple white Ikea Vivan Curtains with the Dahlia Fabric I added to the bottom, it added extra color to our otherwise pretty white dining room. After we completed out Dining room head to toe makeover, I wasn't ready to commit to anything to bold, so the bottom pattern  fabric was perfect. I thought about sewing full length Dahlia Curtains but at $ 26 bucks a yard on Sale for 5.5 yards for fabric would be $143 bucks plus shipping. I wasn't feeling the price. I decided if I came across some pretty fabric for under $15 bucks a yard, I'd go for it.


Well months passed and nothing. Enter Home Fabrics, I've heard about them on different blogs and my girl friend Summer (she just started a blog, check it out!) that lives in So Cal shops there all time. Anyways they finally opened a new store in Northern Cali, praise the Lord. So one after noon a few weeks ago Avery and I stopped in to check it out. Within in minutes I was in fabric heaven, they had a ton of fabrics. Originally I was there shopping for Navy Linen fabric for my living room, I mention wanting to change the look a few weeks ago.


I didn't find any navy fabric, I got distracted when I saw the large print floral fabric, I like the shades of aqua and teal mixed with the greys and browns. It was perfect for my dining room, except one minor problem. Hasani wasn't with me and I was afraid he'd nix the fabric because it was floral. We make it a point to agree on major changes and going from pretty much all white to a floral print was a major change! I texted him the picture, and 10 minutes later with no response I went with my gut and purchased 5.5 yards of fabric. Lucky for me he texted back saying he liked the fabric and to go for it. The best thing of all is the fabric was only 5.99 per yard!!! I paid $ 33 smackaroos for 5.5 yards of fabrics which breaks down to 198 inches of material!! Can I get a high five! Woo Hoo!

Before I share the afters, here's how I transformed 198 inches of material into two back tab style drapes for our dining room. Cutting material that long can be a challenge, so first I folded the fabric in half width wise, then folded it in half. I then cut the fabric in half leaving me with two 99 inch pieces of fabric. I decided I wanted my panels to be 93 inches each.

I sewed the sides of each panel first, then I folded the hem over one inch two times. Next I ironed the hem flat and then pinned and sewed each side. For the bottom hem and folded the fabric up two inches pinned and sewed.


I really like the look of back tab drapes, they look clean and almost like pinch pleat drapes without the fuss. It's the same style curtains I had in the dinning room, they can be back tab or you can use the rod pocket. I decided to sew the same style. I folded the top hem down four inches and iron then pinned. Instead of sewing individual tabs, I used ribbon as the tabs. I got this idea from Jenny at Little Green Notebook. I bought two rolls of dollar ribbon from Micheal's and spaced the ribbon five inches apart and pinned the ribbon top and bottom to the fabric. Next I sewed the ribbon onto the fabric.


I really like how the new drapes for the dining room turned out. The pretty large floral drapes bring in so much color into the dining room. The new panels are 93 inches long, 3 inches shorter then our old curtains. Hasani moved the new curtain rod down and the new drapes rest on the floors perfectly. I love for how finished the back tabs make the panels look, so pretty. Here's our new panels. Sewing the panels was super easy, the longest part of the whole process is pinning and iron the panels.


Here's how the fabric looks pulled out, I love the fabric. The fabric is super heavy and like a woven style. I forgot to mention, before I began sewing the panels Hasani and I had decided which way the print would hang. Either the leaves up or down, after much discussion we decided we liked how the leaves looked down.

Sorry for the bad lighting in this pic!


Here's a quick breakdown of how much the new back tab drapes cost to make. I spent $ 33 bucks on fabric and $ 2 bucks on two rolls of ribbon, total $ 35 for a pair of custom back tab drapes. Each panel only $ 17.50 crazy affordable!!

What do you think of our new drapes? Have you sewn drapes for your home?

Photobucket

Do You Coupon?

You all know I love a good bargain, thrifting, Craigslist, but do I use coupons? Yeah, not like I should. I've got some good deals using coupons ( nursery chair, light fixtures and fabrics ) and I almost never pay for shipping thanks coupon codes. When I'm hunt for a good deal as mentioned above, I'm all about coupons. In everyday life (shopping at Target, Groceries) coupons are almost non existent. I am good about using my Safeway Club card while grocery shopping to save on 'club card specials.' After talking with girlfriend about how much she's been saving on grocery bills & household items, its finally time I tackle coupons like a pro. She suggested I check out The Krazy Coupon Lady website, where I'll really learn how to get my coupon on!

{ Screen Shot Krazycouponlady.com }

It's easy for a newbie couponer (is that a word) to get overwhelmed, thankful there's a beginners tab. I learned so much about how to use coupons the right way. Normally if I have a coupon and I want to use it, the generic brand or another brand is cheaper, so my coupons go unused. I learned to use my coupon when the item goes on sale! For the most savings. The site recommends starting a binder, and saving all your coupons. I started my new coupon routine on last Sunday { we only get the Sunday paper } which is perfect because I can save the coupons & look at the sales ads to use my coupons. The binder option didn't work for me { to bulky }, instead I got a pocket folder with individual pockets to store my coupons by type. I have a pocket for; health & beauty, cleaning products, groceries, Starbucks, baby stuff and dog care. I like that I can carry my folder with me in my diaper bag, without looking Krazy :) I sat down when it was quiet on my living room floor and starting sorting and cutting out my coupons. I have a pretty good little stash so far.


Each page contains a clear pocket, perfect spot for me to store coupons. I now know to use the Carter's 20% off coupon I have when a sale is going on, lucky for me there's an outlet near my house that has sales! I'll be stocking up on my baby clothes for Avery soon. It's had for me to resist cute baby clothes, so the extra savings make me happy.


Since getting my feet wet so to speak in this coupon world, I've already been seeing savings. Yesterday I had to buy to food for Mojo, which was perfect timing his dog food regular price is $12.99, using my club card it was
$10.99. I had a coupon for $4 bucks off the same brand! I only paid $ 6.99 - its so unreal I saved $6 bucks! Just by taking a few moments out of my day to clip coupons!


Thanks to my girlfriend I also learned about a free 8x10 Canvas Special that's mention on the Krazy Coupon Lady site, all you pay is $ 14.95 for shipping and handling! The canvas is from Canvas People, I placed my order last week and its shipped and on its way to my house. We decided to order our new family blog picture. I'm so excited can't wait to see how it will look in person. Such a great deal for under $15 bucks! Click here for the link I will share our canvas when it arrives. I'm going to order another canvas from our wedding. These make great gifts.


I'm looking forward to fine tuning my coupon shopping skills and saving some money in our everyday life. I love that her site list coupons by store, I so need to use coupons when I shop in Target! I'll up date how I'm doing with coupons and will keep track of my savings for the next month and see how it all adds up.

Do you use Coupons? How often? What are some of your coupon tips? Could you be on Extreme Couponing? How do you organize your coupons? What sites do you love for coupon tips??? So many questions!!!

Photobucket

Giveaway Extended!!

I've extended our 3M Frameworks Sample Pack Giveaway. The pack includes a ton of DIY Tools that will make your next DIY project easier. The pack includes: One Roll of Blue Tape, Two 3M LeadCheck Swabs Three Stages of Sanding Blocks (green, maroon, gold sandpaper) One Pair of Gloves, a pair of gloves, respirator, eye wear!!! That's a whole of of DIY Goodies! :)

Here's a Closer look at the 3M Sample Pack


Enter:

1. Like 3M Framework on Facebook & Share Your Couple Speak Story on Their page (see # 3 for example)


2. Then post a comment on my blog post ‘saying that you have participated '

3. Share your Couple Speak in your post on my blog!

Couple Speak Example:
Me: “That looks crooked” means “Go get the level”
Hasani: “It’s fine” means “Where’s my level at?”


Giveaway Ends - Friday September 23 at Midnight

Enter Here or on the Original Post!!

( people who have already entered will be combined with the new entries )
Good Luck! If You Have Any Questions about the Giveaway please email me!!
Photobucket

Two Years Ago Today

I know what love it is because of you - Herman Hesse

Happy Anniversary Hasani, I love you more than words can say.  

Today we'll be celebrating on Second Wedding Anniversary { you can read More about Us & our DIY Wedding Recap here, here and here } 

Stop back later today for a Giveaway!
Photobucket

Mirror Makeover

* A big thank you to everyone for helping us choose our new Blog Pic! Another big thanks for all the sweet words about my family, we have lots of fun together & I'm glad our pictures capture that! As you can see we went with picture 'A' and added Mojo's picture too. We love that our blog now represents our whole family. Even though I'm they main blogger (Hasani chimes in from time to time) this is truly a family affair documenting all the fun and sometimes stressful projects we've done since becoming homeowners *

Now back to the mirror makeover. Back when I was shopping for a dresser for Avery's nursery I came across an old 70's mirror at a local thrift store. Once I saw the mirror, I knew I had to have it. A while back  I missed out on a fab mirror, because Hasani couldn't see its makeover potential. This time I listened to my gut and loaded the huge mirror into my shopping cart. I paid $ 25 bucks for the mirror, but considering its size and weight, it appears to be really wood cut all one piece, its actually a good deal.


When I came home with my prize, sure enough Hasani thought I bought home a lemon you know an ugly car that you paid to much for and can't take back. Then I reminded him of the mirror that got away, and shared with him my inspiration from Little Green Notebook. Jenny took an aged mirror and transformed it from icky to wow. She painted the mirror a moody grey.


I decided the best spot for this mirror would be at the end of our hallway. The one and only hallway hasn't seen much decor action in our house, just paint and an updated light fixture we installed months ago. I thought by installing the mirror at the very end of our hallway it would accomplish to things. 1. Bounce more natural light around during the daylight hours. 2. Make our hallway look larger, since mirrors always have that great affect. Next I took color inspiration from the pillows in our living room. I love the new floral pillows, great colors: greens, navy, golden yellow, turquoise.


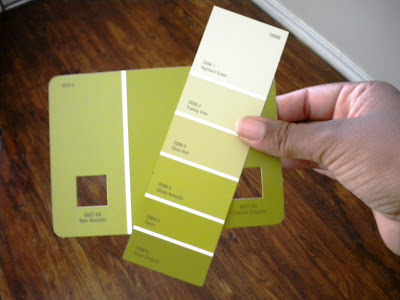
I thought the painting the mirror a shade of green would look really good. I went to Lowes and bought a small sample paint size of 'Crushed Oregano. Before applying the paint, I cleaned the mirror with soapy water and then applied a coat of primer. After applying the first a few brush strokes of paint, I HATED how it was looking it was just awful. So I went back and thought what about a darker green, nope another FAIL.

So instead of jumping into another color fiasco, I do what I always do when I hit a design wall. I take a few days off from the project and come back to it with fresh eyes. See the to oops colors in the back ground, yeah not my cup of tea of this mirror. Anyways this time I decided to go dark deep navy. I bought 2 cans of Krylon Fusion paint in glossy. It says its for plastic, but also works on wood metal. Plus I liked the fast dry time.


I was very impressed after spraying on one coat of paint. Everything was looking smooth and shiny. Crazy glossy shiny and I HATE spray painting, but this spray paint and I for along. I was a little concerned the navy blue I was going for wasn't getting dark enough, but by coat # 2 I could already see a darker shade emerging. After spraying on the final coat I wait 12 hours before bringing the mirror inside, plenty of time for the 'spray paint smell' to blow away.


This once dated mirror used to be attached to a dresser, so I needed to install new hanging hardware. I decided to go with U brackets, they promise to hold 50 pounds. We estimated the dresser was likely around 15 pounds. I my ruler to pick the placement for the brackets and help create a strait line. The Hasani nailed in the hanging hooks. The mirror hangs just outside of our bedroom and Avery's in the future we'll look into a new method of hanging the mirror as Avery gets older and mobile and starts to pull himself up on objects. I can see us drilling directly into the mirror into a stud. We'll share what we end up doing.


Here's a the after, a nice long shot of how the mirror looks in our hallway. In this picture its hard to tell what color the mirror is, but in real life you can easily tell its a deep navy. I LOVE how the mirror looks its glossy and pretty and does exactly what I wanted, bounces more light around and creates the illusion of a larger hall.


Look at the shine!


Although it took longer to get to the after on this mirror with the two color hiccups along the way! I'm really glad I stuck with it, I love find old pieces and giving them a second chance and an updated modern look.

** Update, I forgeot to mention, I spray painted right over the green paint and did not prime and had great results! It's usally recommended that you prime first **

Have you transformed any old mirrors lately? Have you had in color hiccups with a project before, what was the end result?


PS: Also check out this post here about Organized Spaces on ReNest, from Apartment Therapy Chic Little House was mentioned! :) Super cool to be included in such a great group :)


Photobucket